Tuesday, October 30, 2012

The Very Pretty V-Stitch

I recently posted this gorgeous purple cowl to my Etsy Shop, and the reason I'm bringing it up now is that I made it using what is rapidly becoming my favorite crochet stitch, the V-stitch and I wanted to share a quick tutorial on the stitch itself!
(run-on sentence much?!)
It's called the V-stitch because when you crochet two in one on the bottom and leave a space at the top it looks, suprisingly enough, like a V...
I love it because it looks elegant, it adds a slight texture to the cowl, and it's fun to do!
Ok, I'm currently working on the same cowl in a heather grey, so I will be using it to demonstrate the stitch.
To begin you want to create a chain, for instructions on casting on and creating a chain go HERE,
When you are ready to turn, chain three...
yarn over...
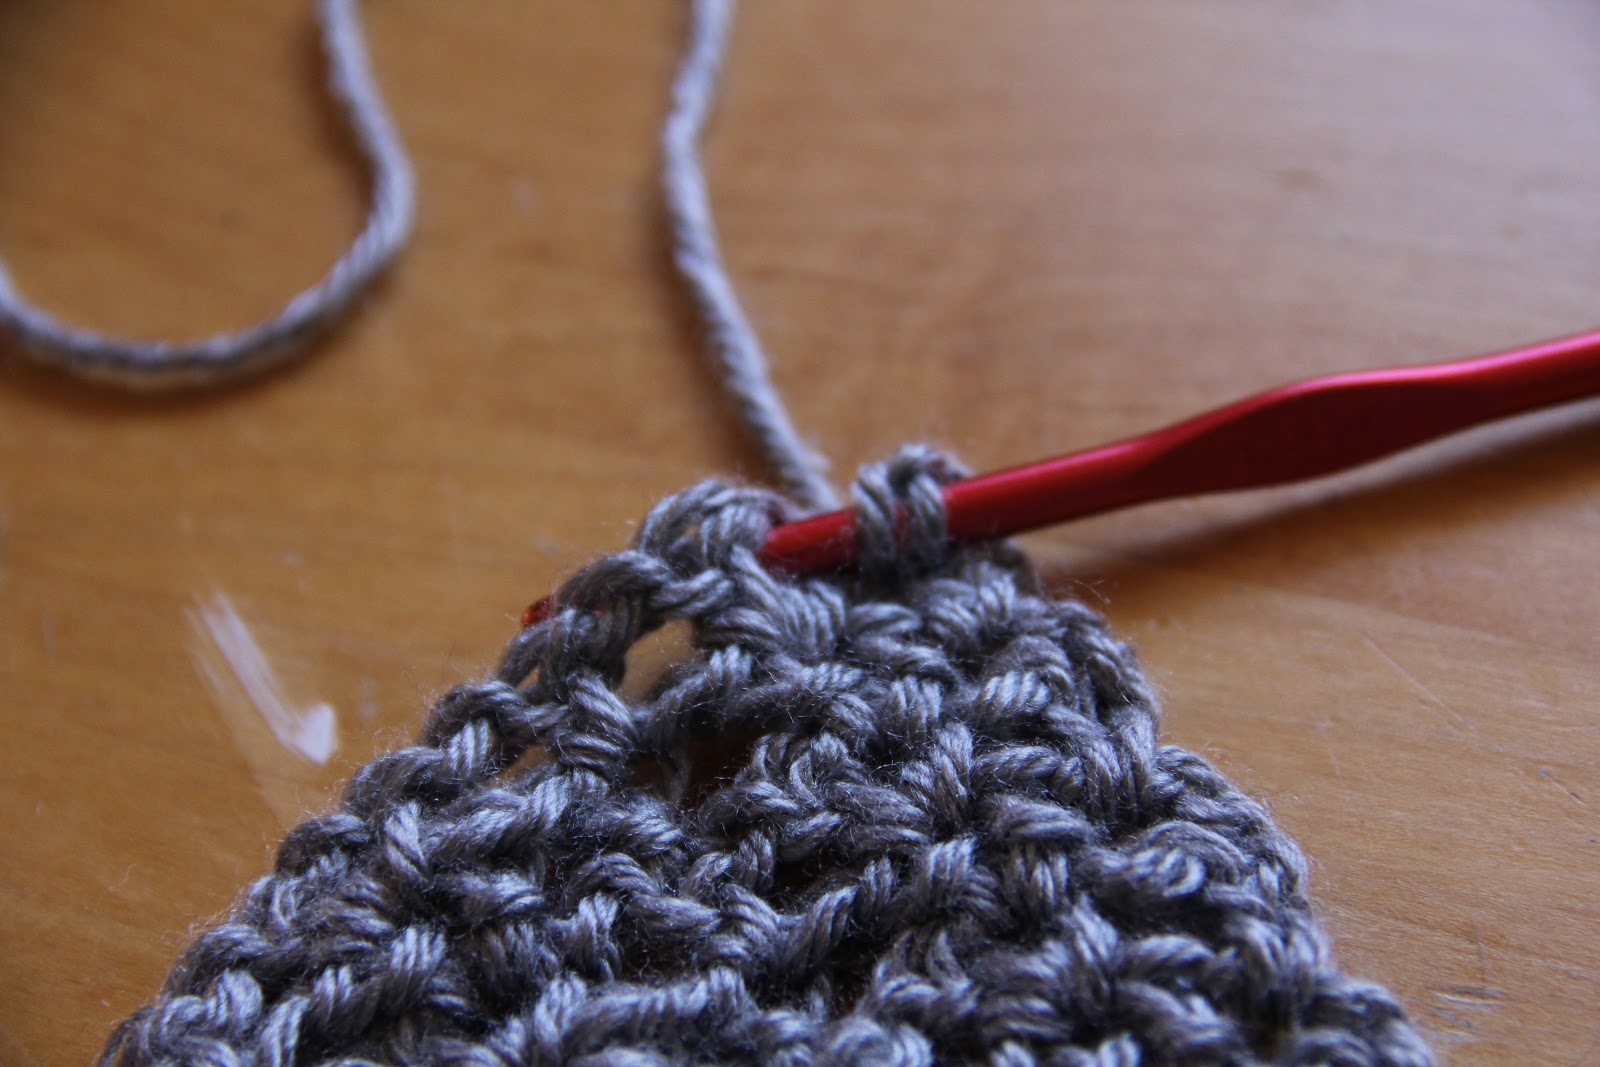
skip two stitches and enter through both loops (similar to the way you would for a double crochet)
It should look like this, then yarn over again...
And take the center two loops and pull them over the top strand...
It should look like this.
Now you will yarn over one more time, and pull the bottom two loops over the top leaving you with one loop on the hook.
Now chain one...
and yarn over...
Then re-enter in the same place that you did the first stitch.
And repeat the same process as the first stitch.  There is your V!
Now, chain one, skip a stitch, yarn over and enter through the top of the second stitch (again like a double crochet, in fact, this part of the stitch is just like a double crochet) yarn over again and pull the middle two loops over the top.  Yarn over and pull the bottom two loops over the top loop.
Then just repeat and repeat and repeat!
To clarify, the pattern is skip one, v-stitch, skip one, double crochet, over and over!
 The other day I decided to combine the v-stitch with a thicker yarn, the yarn on the right is the standard worsted weight yarn that I normally use.
I love grey, but I wanted a pop of color, so I chose a bright yellow to go with it.
I really like the way it turned out, the heavier yarn is still super soft, but the combination of the heavy yarn and the v-stitch made it chunky and full of texture!
 I'm going to need another one of these babies, but next time I think I'll make it just a little bigger, this one is great, but a little more snug than I generally like.
Still cute, though!


Sunday, October 28, 2012

A Halloweeny Weekend!

As you all know...
This year we are the bat family!
(Costume tutorial found HERE)
And this weekend we got a lot of mileage out of our costumes!
Beginning with a costume clad birthday party...
Complete with a practice trick-or-treat session...
 Which the kids really enjoyed!
Gigi is an expert treat gatherer now, primed and ready for the real deal on Wednesday!
(Note the bling added to her bat suit!)
After the party we headed over to the Englewood Rec Center's Halloween Carnival!
Where we met up with good friends, played in the ball pit, jumped in the bouncy house,
AND...
Got to sneak up on what was surely the REAL
IRON MAN!!!
And Sunday brought yet more festivities with our church's costume party!
As you may remember, we take pumpkin decorating seriously...
Well, ok, not that seriously!
And decorating with our good friends Brennon and Connor made the decorating extra fun!
Or course, there were games to play too...
The favorite being musical chairs!
And once the party was over...
We headed home to carve up the one million pumpkins we have now collected!
We didn't actually carve them all...
One of them became a potato head style princess...
And the pumpkin guts proved to be just too icky for Gigi who stuck her hand in only once and could not be persuaded to do so again!
The squirrels in our neighborhood are a bit aggressive, and they carved one of the pumpkins for us!
But we got Bert and Ernie and a cat out of the process, who all look fabulous next to the princess who has clearly fallen and cannot get up!
I gotta say, I am loving the bat costumes, comfortable, warm, easy on easy off, and no small pieces to lose! 
After a long weekend of Halloweeny festivities and messy treats
The costumes were in need of a washing, and I'm pleased to say that they came through the wash with no trouble at all!
So that's 3 Parties down and one more to go before we even get to the trick-or-treating!


Friday, October 26, 2012

Old Dog...New Tricks! (Talking About PJ Pants Here!)

I love adding a little more style to my super simple pj pants by making the hem a complimentary color!
It's a simple trick that really makes a big difference!
When Noah moved from his crib to his toddler bed we bought him a bed set that included a top sheet which he never used!  I, of course, put it away with my spare fabrics intending to use it for some future project.
I thought it made sense to turn a sheet meant for sleeping under...
into pajama pants meant for sleeping in!
I used the Even Easier Pj Pants method, found HERE to create the basic pants, with just a few minor changes...
On my pattern, I shortened the hem by 2 inches, you could do more or less depending on how dramatic you want your colored hem to be...
I didn't want to cut the pattern, in case I want to use it later, so I just folded the hem up.
Then I measured the width of the hem and doubled it, mine turned out to be 16"...
And cut two pieces of my coordinating color 4" x 16".
I folded my hem pieces in half hot dog style and pressed them.
And pinned the folded piece to the right side of my pants hem.
I attached it using a 1/2" seam allowance, and I made sure to finish the edge!
Simple, right?  Now all you have to do is follow the Even Easier PJ Pants Tutorial found HERE to sew the pants together!
And what did Noah think of his snazzy jammies?
There are no words!