Friday, August 23, 2013

My Happy Place!

As a teacher, my very favorite "Aha!" moment was watching a child learn to write their name.  The moment when a child makes the connection that those specific letters put together in just that way equals "me"
 is absolutely magic!
Running a close second, is the progression from name recognition to reading words on signs, in books, on cereal boxes...
As a mom, I have found that I love those "Aha" moments even more...
Especially since Noah has discovered the same joy, and can't wait to share it...
with his sister!
This is my happy place!

Tuesday, August 13, 2013

What the Heck did we just do?

The title of this blog brings to mind a plethora of things (that's right, plethora, slipped in a $5 word ;)...
Like that moment when you shut and lock your car door only to realize your keys are sitting on the driver's seat...
Or, that moment when you accidentally drop your cell phone someplace aquatic, and you know there will be a bag of rice in your future...
But actually, I was referring to that moment when you decide to demo your basement, that moment when the dust clears and you realize that the ceiling cannot be put back up without major effort and expense, and you have a disaster on your hands and there is no going back, you are committed...
Welcome to HGTV's new hit series "What the Heck did I Just Do?!!!"
Ok, so you remember what it looked like after we spent a weekend cleaning, organizing and getting rid of things?...
Note the cork tiled ceiling, the shag carpet, and that huge bulkhead taking up monstrous amounts of space?
Well...
It was one of those spontaneously thought out moments, you know, when you think and think and think about a problem and finally, one day, without any planning or preamble, you just get to working on it?, we began demoing the above pictured basement...
Cork ceiling...gone.
Bulkhead...gone.
Carpet...gone.
Trash, dust and assorted flotsam?...
Epic!!!
Good thing there's beer...
Too bad it's from 1950!
And it would be my luck that the sum total of historical finds in my 1916 era coal shoot basement would be empty beer cans instead of priceless jewels, historical documents, or the ever sought after box of money! 
sigh...
Things are still in upheaval mode, but the ceiling is in...
And it's beautiful Colorado blue beetle wood!
And the walls have been primed...
Thanks in no small part to the hardworking efforts of my painting pal...
The floor will remain concrete for the time being, a big step up from the shag in my opinion, but I will take my time deciding between laminate wood or tile (Hardwood is not an option because of ceiling height)
But it's looking better and better all the time, and I have to say a great big thank you to my Joshua who jumped right on board the crazy Vanessa renovation train without much complaining or protesting!
Stay tuned...

Thursday, August 8, 2013

Time to Make a TuTu!

Ok, so Gigi has recently discovered the magic of the tutu...
Which is great, except this particular tutu was made for a 6 month old Gigi...
So now, the tutu puts a bit of a squeeze on her 2 year old tummy.
(Can I get an Awwwwwww!!!)
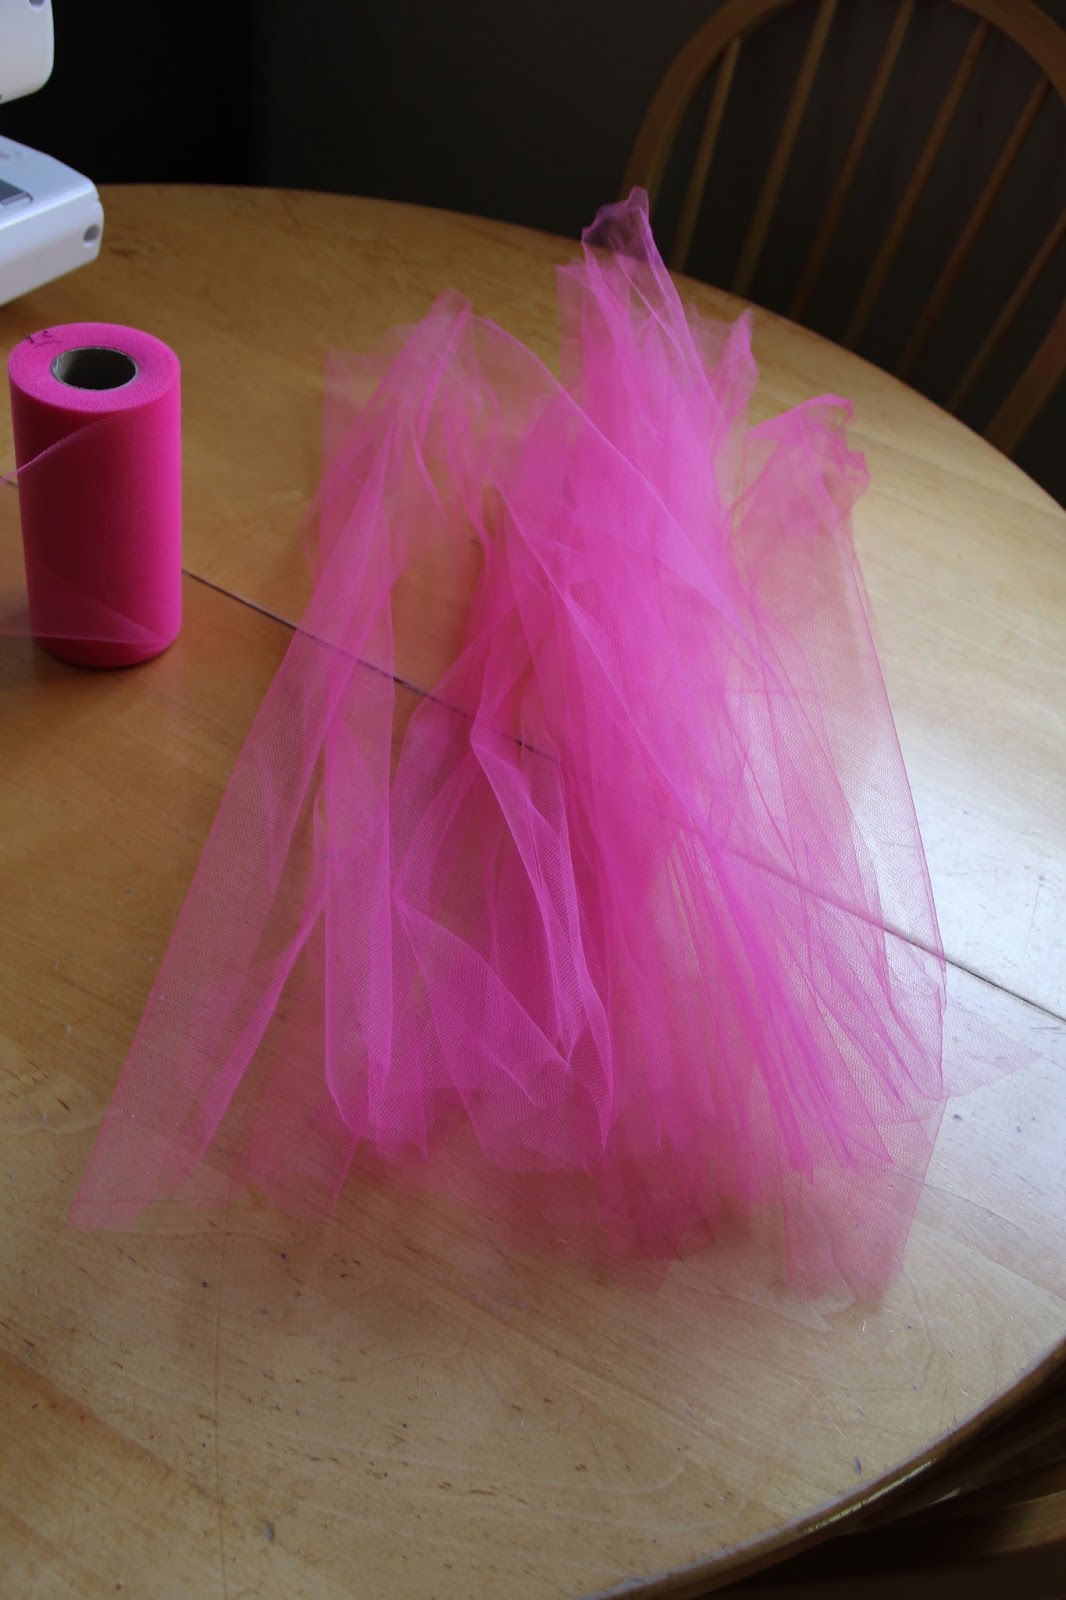
She doesn't seem to mind it, but since I found this roll of pink tulle on clearance for next to nothing, I decided to update her tutu repertoire, while sharing the super easy process with any other ambitious girly mamas out there!
Step one is to decide how long you want the tutu to be, I've found that a large hard back Dr Seuss book serves as a good template...simply wrap the tulle around and around the book until it looks like you may have enough to fill out the tutu skirt...
Then simply cut along the bottom edge of the book...
When you're done you should have a pile that looks something like this!
(inevitably you will end up having to cut a few more, but this is a good start)
Now you need to measure your child's waist and cut a piece of elastic to fit, sewing the ends together with a zigzag stitch to create a circle...
The easiest way to tie your tulle onto the elastic without losing your mind in frustration, is to slide the elastic up you leg...
Fold the tulle piece in half, slide the folded edge under the elastic, and flip the ends through...
When you pull it tight, it should look something like this!
(try not to pull it too tight, you don't want to bend the elastic)
Once you have repeated this process endlessly, you will end up with what looks like a finished tutu...
Sadly, this assumption is premature, because a waistband made of tulle is itchy, and an itchy tutu will never be worn, so...
Bring on the ribbon!
The ribbon I used was 3/4" wide, and that was a little too wide for this, it made the wrapping process more difficult and not as neat as it should be, but it's what I had...
Begin by tying one end of the ribbon onto tutu...
Then carefully begin wrapping the ribbon around every piece of tulle (yes, this is a tedious and frustrating process, but it is well worth it to protect those sensitive tummys!
Gorgeous!
Ok, lets test out this tutu...
Oh yes!
And what do you do when presented with a brand new pretty pink tutu?
Well, first you pose like a "rina" (ballerina)
and then you put on a show...
 And, of course, big brother is a willing and enthusiastic audience...
And the tutu just never gets old...
Although, Gigi's enthusiasm for the mama paparazzi wains relatively quickly...
"Dop it mommy!"


Saturday, August 3, 2013

The Prettiest Darn Viking You Have Ever Seen!


I think I mentioned a few posts back, that we visited the Renaissance Festival this year...
Well, while we were there, a young fellow passed us by wearing a knitted viking hat complete with full beard!
Now, the guy had to be melting in the 90+ degree heat, but Joshua immediately turned to me and said, "I want one!"
So... 
Now you will have to forgive the photo quality of this post, I used my phone for the convenience...in other words, after crocheting this beauty for hours on end, I got lazy!
For the hat base, I used my standard hat pattern, but I had no pattern for the horns or the beard...
I decided to do a cascading pattern for the horns, and sew the cascade together at an angle...
And, after stuffing the opening with a bit of batting...
It came together beautifully!
I kept it simple for the beard, only adding a mouth opening for wearable comfort...
I made the beard optional by sewing buttons to the inside of the hat, and...
What do you think?
With the beard?...
Without the beard...
With the beard!!!
Nailed it!!!
Gigi said, "Wuv dis hat!"
Hmmm...Halloween costume idea?