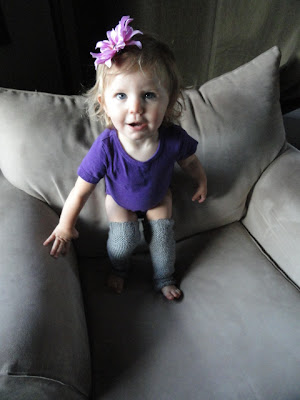
This post was a long time in the making, I got the pictures taken, and then life happened and I forgot about them, so you may notice that the picture quality is a bit lacking (this was pre-nice camera) and that Gigi looks a wee bit younger here!
Usually I crochet my baby leg warmers, but I have been known to dabble in the world of knitting, and since they came out so darn cute, I thought I'd share the process!
I should preface this by saying that while I will post the "formula" for these leg warmers, it is in no way meant to teach anyone to knit. My mom is the expert, not I!
I like to use the 5 oz Carron Simply Soft yarn which is super soft as advertised and comes in a variety of colors. (I went with Grey Heather) The yarn can be pricey, but most large retailers offer coupons or have decent sales if you're paying attention. (Also, they have Apps for that!)
For this project I used Size 7 knitting needles, but you can use any size you wish, larger needles will make bulkier leggings and smaller needles will require more stitches.
The first thing you have to figure out is what size your leggings should be. For that I cut two pieces of yarn, one I used to measure around the largest part of her leg, the other I used to decide how long they should be.
Mine ended up being 35 stitches by 60 rows
I cast on 35 then create a pattern by knitting 5 then pearling five
The first 10 rows will be the top of the leg warmer, once you have ten you can begin kintting the bulk of the leg warmer, just knitting, no pearling here :) I did 35 rows.
Once you get through the main body of the legging it's time to start the knitting and pearling pattern again, this time for 16 rows, or whatever amount you determine, just make sure it is more rows than the initial set as this portion will go around the ankle.
Once you cast off make sure to leave an extra long tail of yarn for sewing it all together.
It is tricky to thread a needle with yarn, but it can be done, pick a needle with the largest eye, or you can buy a needle specifically designed for such endeavers.
Fold the leg warmer in half, there is no right or wrong side here, and start sewing it together.
Once your done sewing the seam, slide the needle back up through the stitches and cut off the remaining yarn, this will keep the tail from coming loose and hanging out.
Turn it right side out and voila! Now go do it again for the other leg!
The knitting process takes a bit longer than crochet, and since I am not a patient individual, I will probably continue to focus on the crocheted version of the baby leg warmer which you can find in my Etsy Shop!
But be sure to give this pattern a try...
I promise it's worth it!


Adorable! (And I love your nail color!) Great how-to shots, too. (I'm particularly fond of the posts that have lots of pictures of my grandchildren. Just sayin'.)
ReplyDeleteGood job, Sess!!!